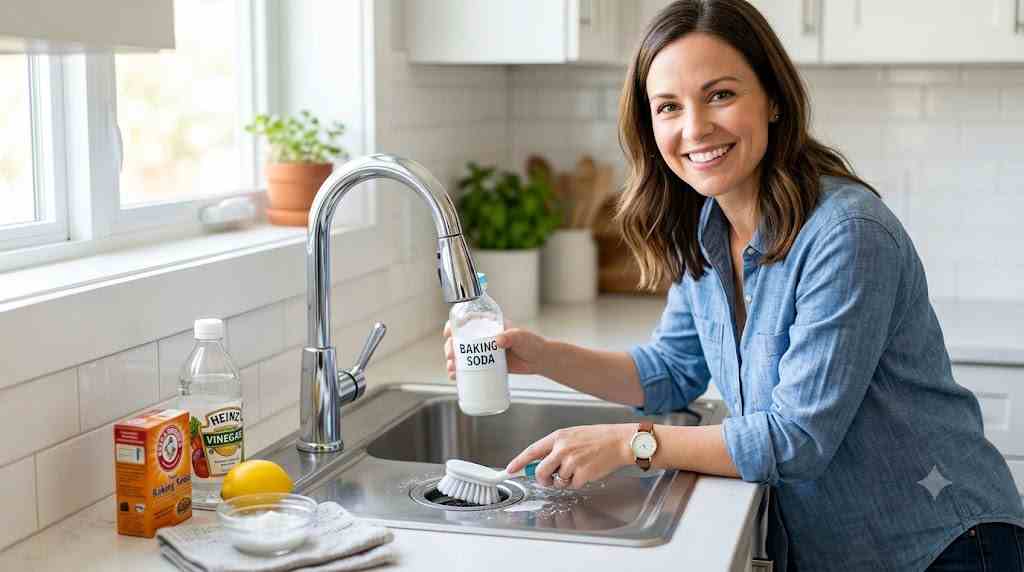
When you wash a bunch of dishes and notice the water is still there and not going from the sink pipe properly, or in a worse case, you notice a sour odor wafting up into your kitchen or bathroom, it’s time to call a plumber. The first thing that came into your mind is to go for heavy-duty, store-bought chemical drain cleaner. Don’t do it.
These harsh drain cleaners work as a quick fix, but they are based on aggressive chemical reactions that cause intense heat. With time, this can melt the plastic PVC pipes, corrode older metal plumbing, or destroy septic systems’ beneficial bacteria. They also cause toxic fumes in the home.
Well, you don’t need these harsh chemicals; all you can do is learn how to clean a sink drain with the help of using non-toxic household staples like baking soda and vinegar. These ingredients are completely safe and budget-friendly.
Why Do Sink Drains Get Smelly and Clogged?
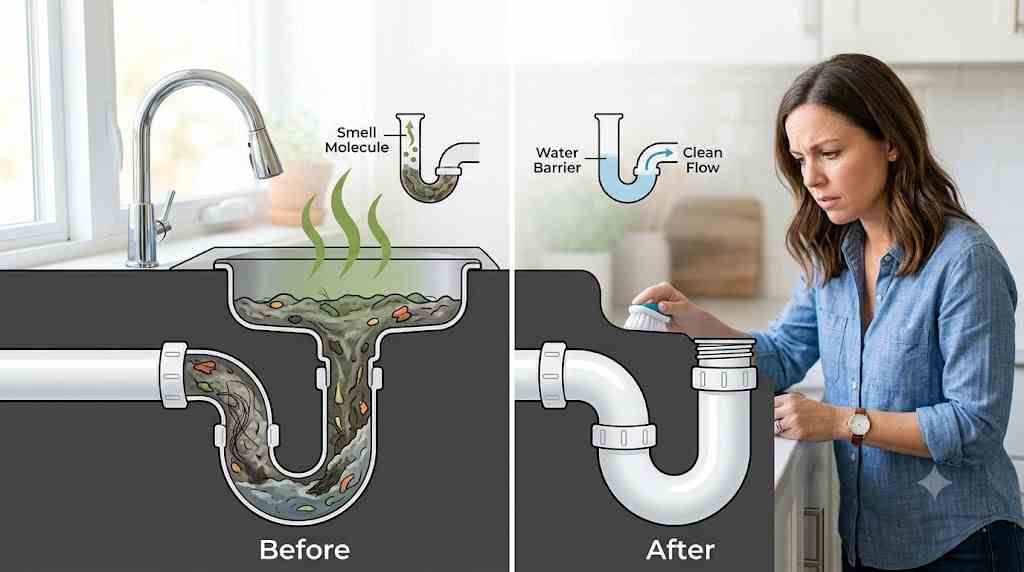
To fix the drain problem, you need to understand why the sink is clogged and what is actually happening inside the pipe. Consider sink drains as magnets that attract the debris on a daily basis, and with time that debris creates a sticky lining in pipe walls. In this lining bacteria get trapped, resulting in slow drainage and a sour odor. Here are the primary culprits causing the buildup:
Cooking Fats and Oils (FOG): These are the main enemy of kitchen plumbing. Even when you don’t push the oil in the sink directly, the oils from plates and pans go down the drain like other liquids. These fats hit the metal of the pipe and solidify into a hard, waxy sludge that works as glue for other debris.
Soap Scum: When we try to clean sink drains normally, it creates more mess because those traditional bar soaps and harsh dish detergents react with minerals in hard water, leading to more sticky soap scum lining the pipes and narrowing the passage of water.
Food Particles and Organic Waste: When you wash the dishes and things like coffee grounds, pasta, or potato peels go in the drain, they will get stuck in the sticky soap scum and fat layers, which cause foul odors.
Hair and Fibers: These two play major roles when it comes to pipe blockage. Hair is stuck in the edges of the drain, which works as a blockage that adds all coming things, like soap scum and toothpaste. Understanding these common culprits can help in preventing future clogs. The baking soda and vinegar combination is perfect to break this type of blockage.
The Science: Why Baking Soda and Vinegar Work
When we were in school, we all saw the volcano experiment based on baking soda and vinegar, but how can this help in cleaning plumbing? Well, it’s all about acid-base chemical reactions.
Baking soda is a chemical base, and vinegar is an acid. When they combine, they neutralize each other and make a substance known as carbonic acid, which decomposes easily in water and CO₂. The result will form bubbles; this chemical reaction cleans the pipe.
Debunking the Myth: It Does Not Melt Hair or Grease
Some people have the misconception that the combination of baking soda and vinegar works like a commercial Drano, meaning it will dissolve hair, solid plastic objects, or thick chunks of grease; however, it won’t do such things. The caustic chemical cleaners that are based on high pH like sodium hydroxide can do that.
The Real Power: Kinetic Fizzing Pressure
Now you have a question in mind: If the combination can’t destroy the blocking elements, then why is it effective? Well, it is the fizzing reaction.
When you add baking soda in a narrow pipe and then add vinegar, the CO₂ will expand because the pipe restricts the gas from going; the expanding bubbles make downward pressure. This bubbling works as a microscopic mechanical scrub to break the blocking elements like sticky slime, soap scum, and food particles on the pipe wall. Once they break, you can use hot water to clean the pipe.
How to Clean Pipes with Baking Soda and Vinegar (Step-by-Step)
Now you understand the science of why the baking soda and vinegar method is essential for pipe cleaning; it is time to know how this duo works. To make the drain cleaning successful with the help of baking soda and vinegar, you don’t need to have any special plumbing skills, just the right ingredients and timing to maintain the chemical reaction.
To prepare an effective combination, you need to gather the following things:
| Item & Quantity | Why It Matters |
|---|---|
| Baking Soda Quantity: 1/2 Cup | Acts as the cleaning base and deodorizer. |
| White Vinegar Quantity: 1 Cup | Activates the chemical fizzing reaction. |
| Water Temperature Quantity: Rolling Boil | Melts grease layers before you apply the soda. |
| Sink Prep Quantity: Remove standing water | Standing water dilutes the ingredients and ruins the effect. |
| Drain Seal Quantity: Stopper or Old Rag | Traps the expanding gas inside the pipes. |
Step 1: The Hot Water Pre-Flush
The first thing you need to do is boil water in a large amount, then pour it slowly into the drain opening. This will warm the pipe and melt coagulated grease, oils, or loose soap scum that are on the pipe walls.
Important Plumbing Warning: Only use boiling water if the pipe is made from copper or galvanized iron, not plastic, because it can break the pipe and cause leakage.
Step 2: Packing the Baking Soda
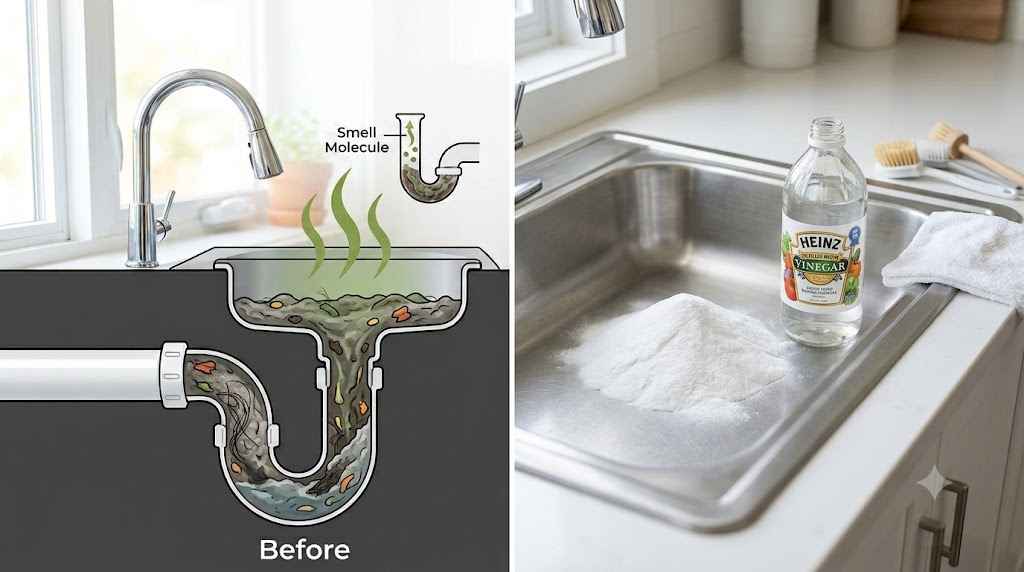
Take 1/2 cup of baking soda and pour it into the dry drain. If your sink has a small space, use a spoon to pour it so the baking soda easily sits inside the drain line.
Step 3: Adding the Vinegar & Sealing the Trap
Once you pour the baking soda, now it’s time to pour 1 cup of distilled white vinegar. The mixture will start to develop foam. To make cleaning pipes with baking soda and vinegar work successfully, add a sink stopper, drain plug, or a tightly rolled rag over the drain opening area; this will lock carbon dioxide, and it will expand in the pipe downward.
Step 4: The Waiting Period (15–20 mins)
Leave the drain locked for at least 15 to 20 minutes so the bubble pressure works to break the bond between grime and your pipe walls. Refill the pot with water and let it boil.
Step 5: The Final Boiling Flush
Once 20 minutes are over and the water is boiling, remove the drain plug and pour boiling water into the drain. This high temperature will wash and flush all the things that were blocking the pipe.
How to Clean a Kitchen Sink Drain with a Garbage Disposal
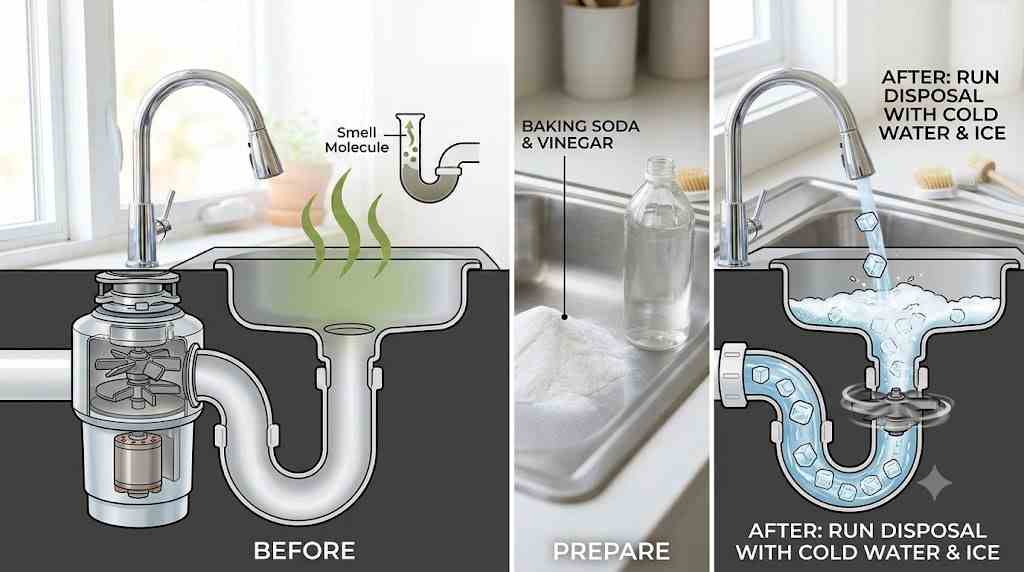
Cleaning a normal drain can be an easy task; however, if it has a garbage disposal, then it can be a challenging one. The internal grinding chamber has blades, crevices, and a flywheel where food particles can stay. If you already use the steps I mentioned earlier but still notice a sour odor, then the main culprit can be disposal. Here are the next steps you can take as follows:
Cleaning the Rubber Splash Guard (The Secret Odor Source)
When many homeowners complain there is a foul smell coming from the kitchen, the main culprit is the black rubber splash guard found at the drain opening. Every time the disposal runs, the odor of food waste and grease stays in the rubber, and since water can’t hit this hidden area, it makes black slime and mold.
To clean it, you need to turn off the power switch to the disposal, then put gloves on your hands, take a toothbrush, and dip it in grease-cutting dish soap or a water-and-vinegar solution. Use the same dipped brush on the drain and flip the rubber flaps outside. Start to brush the thick, dark slime coating the hidden area under it. Wipe it with a paper towel.
Once you clean the rubber completely, now it’s time to clean the internal grinding components. Since you can’t reach the area easily, all you need is to make a mixture that can scrub naturally.
How to do it: First dump 2 cups of ice cubes into a disposal filled with 1/2 cup of coarse rock salt. Turn on a steady stream of cold tap water and flip the disposal power switch on.
Why it works: When the blades start moving, they will break ice crystals in rock salt, which leads to freezing slurry. This combination will act as a sandblaster on the internal walls, removing the grease layers and food residue without causing any harm to grinding blades. Once the ice breaks completely, you can turn it off.
Deodorizing with Citrus Peels
Now everything is clean; you just need to do the finishing touch. It will provide a fresh, natural scent Which removes the remaining odor.
For this, you cut a lemon or orange into small wedges. With cold water running, drop these small lemon pieces in the drain one at a time while the disposal is running.
The disposal blades will cut the small lemon pieces and release natural, highly concentrated citrus oils that work as a natural antibacterial agent that removes remaining odor.
Alternate Natural Methods If You Don’t Have Vinegar
If you were planning to clean the drain with the vinegar method but your pantry is out of it, then don’t quickly run to the grocery because there are many other natural alternatives that can help in cleaning the drain and removing odors.
The Baking Soda and Lemon Juice Method (Better Scent)
If you have lemon in the fridge or a lemon juice bottle, then you can use it, as lemon contains citric acid; when mixed with baking soda, it reacts like acetic acid in vinegar does. For this you need 1/2 cup of baking soda and 1 cup of fresh or bottled lemon juice. First pour baking soda in the drain and then the lemon juice. Seal it with a sink stopper at the drain opening.
The pressure will dislodge the pipe slime, and the natural limonene oils in the lemon juice will leave the drain clean and odor-free.
The Dish Soap and Boiling Water Flush (Best for Grease)
If the kitchen sink is working too slowly due to greasy pots, fatty oils, or oily cooking residue, then just an acid-base combination won’t work. To target the fat molecules you need to break them so they can mix with water.
For this you need a generous amount, like 1/4 cup, of good quality grease-cutting liquid dish soap, and put it into the drain line; then let it stay there for 10 minutes, and then use a large kettle of boiling water in the drain.
The soap that stays for 10 minutes will break the grease in the pipe walls, whereas the boiling water liquefies the fats and swaps the mass slowly from them.
Reminder: Use hot tap water instead of boiling water if you have plastic PVC pipes.
Washing Soda vs. Baking Soda: Which is Stronger?
If you don’t have baking soda at home but there is washing soda in your laundry room, then you have a much more powerful drain cleaner. They both are sodas, so people think they are similar, but they have different chemical profiles:
| Feature | Baking Soda (Sodium Bicarbonate) |
Washing Soda (Sodium Carbonate) |
|---|---|---|
| Alkalinity (pH Level) | Mildly Alkaline (~8.1 pH) | Highly Alkaline (~11 pH) |
| Best Used For | Light maintenance & odor removal | Heavy grease cuts & stubborn slow drains |
| Action Style | Requires an acid (vinegar) to fizz | Works alone via intense alkaline cutting power |
Since the washing soda is highly alkaline, it works the same as a chemical cleaner. Due to high pH, it dissolves organic matter and destroys thick grease and break hair proteins aggressively.
To use it, you need 1/2 cup of washing soda. Put it in the drain and let it sit for 30 minutes. Lastly, flush it away with the help of boiling water.
When Baking Soda and Vinegar Aren’t Enough: Troubleshooting Tough Clogs
Baking soda and vinegar are the best choices for daily cleaning and maintenance of drains; however, they are still limited. This means if your sink is blocked totally with standing water that isn’t going, then you need something more.
Here is how to safely troubleshoot and clear hard clogs without calling a plumber.
Using a Zip Tie or Drain Snake for Hair Clogs
As we discussed earlier, the water blockage in the bathroom sink takes place due to a bunch of hair wrapped in the sink’s pop-up stopper; however, it can’t dissolve or be destroyed with the help of vinegar. You need to take them out physically.
For this you don’t need a plumbing tool; all you need is a long plastic cable zip tie. Use scissors to cut the small, upward-facing notches, then put the
Zip-tie it down into the drain grate, twist it 3 to 4 times, and pull it back; you will see the hair web. Fish it right out.
Using a Plastic Drain Snake: Another thing you can do is buy a barbed plastic drain snake, also known as a zip-it tool. You can find it at any hardware shop. Insert it gently as far as it can go in the pipe, twist it, and pull it back; it will come out with the hair clog.
How to Safely Clear the P-Trap Under the Sink
If the clog is deeper and the snake can’t reach it, then the blockage is taking place inside the P-trap, which is a U-shaped section of pipe under the sink cabinet. Cleaning it takes 10 minutes.
First clear all the items from underneath the sink cabinet, then place an empty bucket underneath the curved P-trap pipe to hold the water inside so the water will drain out when you open it.
Locate the 2 plastic nuts holding the U-shaped pipe in place. Make them counter-clockwise by hand. If you feel they are tight, use tongue-and-groove pliers.
Now pull the U-shaped pipe down so the water can go easily into the bucket. Take the removed pipe to another sink that is working and scrub it and flush the pipe’s interior walls with water completely.
At this point you need to check for rubber O-ring washers, which are inside pipe joints. Make sure they aren’t cracked, brittle, or misaligned because they can also be a reason why water is sitting long in the sink.
Once checking is done, put the clean pipe back into its main place. Tighten the nuts slightly; don’t overtighten. Turn the sink faucet and let water run for a full minute. Ensure the water isn’t going slow anymore.
How to Keep Your Sink Drain Clean Long-Term (Preventative Care)
Once you successfully clear the pipes, it is time for preventative care. You don’t need to wait; when the smell comes back, just follow some habits to keep the drain free from odor. Follow these 3 main rules.
- Never Pour Grease Down the Drain: The main reason why grease takes place in drain pipes is liquid fats, oils, and grease like bacon grease, butter, coconut oil, and meat. Instead of letting them go down the drain, use an old tin can or glass jar, add them in, and directly put them into the trash. For oily pans, wipe the oil with the help of a paper towel before washing in the sink.
- Deploy Mesh Drain Strainers: Another element that is responsible for blockage includes hair, soap chunks, and food fragments. For this, you need a pack of cheap, fine-mesh stainless steel or silicone strainers for sinks so the hairs, etc., can stop in them instead of entering the plumbing line.
- Perform a Weekly Hot-Water Maintenance Flush: To prevent any blockage, use hot boiling water and grease-cutting dish soap every Sunday to clean the pipe.
To back up your content with institutional credibility and provide your readers with trusted, authoritative references, you can include the following official government and academic resources within your article:
Official Sources & Government References
- For Wastewater Safety & Protecting Plumbing Systems:
- Official Link: US EPA – What You Can Do: In Your Home
- For Household Chemical Safety & Safe Disposal Guidance:
- Official Link: US EPA – Household Hazardous Waste
- For Alternative Non-Hazardous Home Products:
- Official Link: NMSU Extension Guide on Safe Chemical Use
