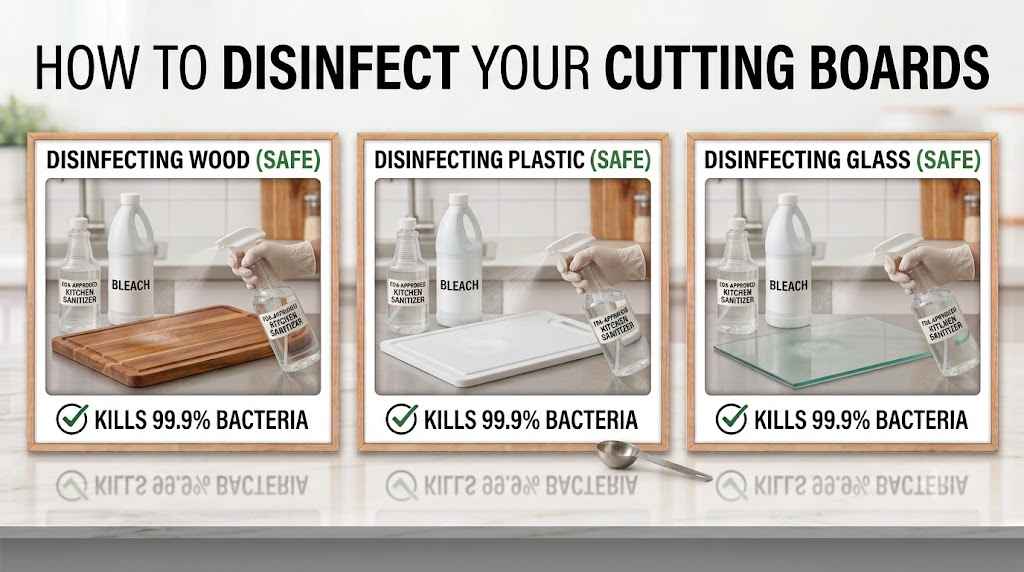
Quick Answer: Once you’re finished with raw meat, wash your cutting board with hot soapy water to properly disinfect it. Then saturate the surface with an approved USDA sanitizing solution of 1 tablespoon of unscented liquid bleach to 1 gallon of water (or 1 teaspoon per quart). Allow the solution to sit on the board for 2 to 3 minutes (5 minutes for plastic or glass) to kill all pathogens, such as Salmonella and E. coli, then rinse with clean water and air dry upright.
| Cutting Board Material | Best Disinfectant | Wait Time (Contact) | Dishwasher Safe? |
|---|---|---|---|
| Wood / Bamboo | Bleach Solution (1 tbsp / 1 gal water) | 2–3 Minutes | No (Will warp and crack) |
| Plastic / Acrylic | Bleach Solution OR 3% Hydrogen Peroxide | 5 Minutes | Yes (Use Sanitize Cycle) |
| Glass / Composite | Bleach Solution OR 3% Hydrogen Peroxide | 5 Minutes | Yes |
Some kitchen tasks are so satisfying, like when you are cutting fresh vegetables on a clean cutting board; however, it can be challenging too if you cut raw meat or chicken on the same cutting board. Many home cooks just wash the cutting board with sanitizer and use fresh lemon and coarse salt to scrub it.
While this scrub can remove the smell and provide a pleasing shine, it won’t remove bacteria like Salmonella, E. coli, and Campylobacter. When we talk food safety, normal cleaning isn’t enough. Learning how to disinfect cutting board surfaces properly is the only way to get rid of such bacteria.
True disinfection needs to change the microscopic environment of the board, not just rub the surface to remove stains. Whether you have a glass, ceramic, or plastic cutting board, the rules of sanitization are different for every material.
In this guide, we will move beyond the aesthetic “sludge” of home remedy scrubs and focus on scientifically proven sanitizing methods for each material, including when it is safe to discard the cutting board. Let’s get started.
Cleaning vs. Disinfecting: The Critical Difference for Food Safety
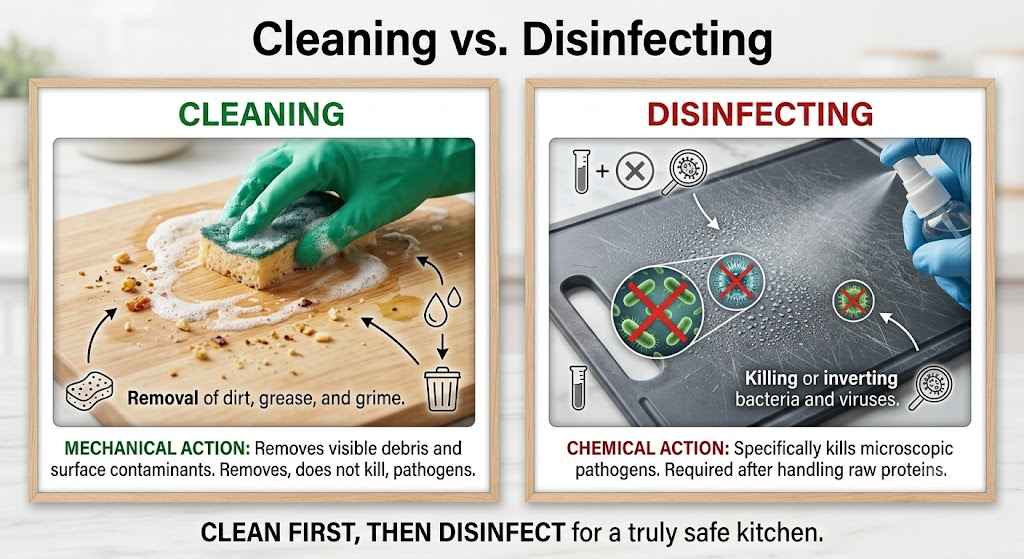
To keep kitchen safety, you need to first remove the main dangerous misconception that cleaning and disinfection are the same. They are two different stages of sanitation; if not completed, the household will be very vulnerable to foodborne illness.
Why Surface Cleaning Only Removes Visible Grime
Cleaning is a smooth process in which you just scrub the cutting board with a sponge, water, and soap to remove the physical dirt. It only cleans surface grease, oil, and superficial organic matter. However, the outside cleaning doesn’t mean it also kills the bacteria.
The bacteria remain trapped inside the pores of the cutting board and knife scars. Cleaning alone isn’t sufficient, especially when you use a board for raw meat or poultry.
The Science of Disinfecting: Killing Foodborne Pathogens (Salmonella & E. coli)
Disinfecting is a chemical process that helps in removing pathogens like Salmonella, Escherichia coli (E. coli), and Campylobacter from board. These bacteria are extremely dangerous and can survive for hours in the microscopic grooves of a cutting surface.
The disinfection needs a chemical agent that clears the board completely, like a food-safe chlorine bleach solution or 3% hydrogen peroxide. According to the Centers for Disease Control and Prevention (CDC), proper disinfection can reduce bacteria by 99.999% and remove the threat of cross-contamination.
The Myth of the Lemon and Salt Method (Why It Fails to Sanitize)
When you search on the internet about cleaning a board, there will be many articles based on a natural deep clean by using a lemon and a sprinkle of coarse salt. Don’t be misled by anything; just check the scientific perspective behind this natural deep clean method.
The Role of Salt: The coarse salt works as a physical abrasive. It is like fine sandpaper, taking away the stains and lifting the top layer of oxidized wood fiber.
The Role of Lemon: Lemon juice has citric acid, which works as a natural deodorizer and organic solvent to remove oils and give a fresh scent. However, what the lemon and salt method cannot do is sanitize because the citric acid in lemon is a weak acid; its pH and chemical potency won’t kill the bacteria on board. It can only help in cleaning stains and odor from the surface.
You can’t depend on the lemon and salt method only if you are using a single cutting board for raw meat items and other things.
The Universal, Food-Safe Disinfecting Solution (USDA-Approved)
When you need to remove or neutralize invisible bacteria, you don’t need any expensive thing like kitchen sprays. The most reliable items you need are easily available at every household; however, because you are dealing with a cutting board surface, safety is the main key.
The Golden Ratio: Bleach-to-Water Dilution Formula
To safely sanitize the cutting board surface, which comes in contact with every food item without leaving any toxic chemical residue, you need to look at the official food safety standards. The United States Department of Agriculture (USDA) outlines a precise golden ratio that makes a food-safe sanitizing solution.
- For a large batch you need 1 Tablespoon Unscented Bleach + 1 Gallon Water
- For a spray bottle, you need 1 Teaspoon Unscented Bleach + 1 Quart Water
Important Safety Note: Always make a fresh solution because the bleach will dilute into water and break loose disinfecting potency after 24 hours.
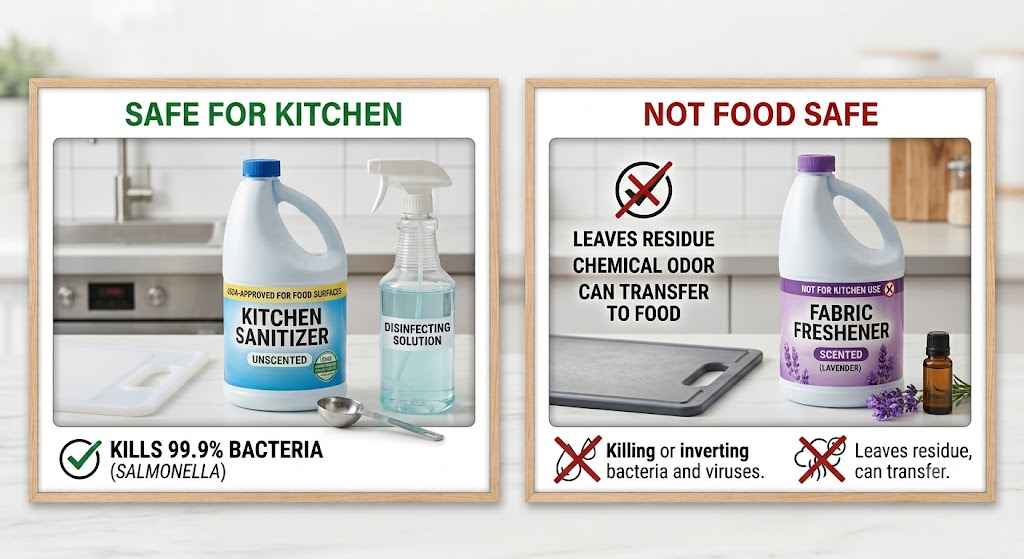
Choosing the Right Bleach (Unscented vs. Scented)
When you buy bleach for kitchen sanitization, always scan the label carefully. Always go for standard, unscented liquid chlorine bleach (which has 5% to 9% sodium hypochlorite).
Always avoid bleaches that have labels like “Lavender,” “Fresh Meadow,” or “Clean Linen” because they contain synthetic chemical fragrances. These fragrances leave chemicals on the cutting board that can go into food easily. Avoid thick or splashless bleach because it is difficult to rinse.
Natural Alternatives: When and How to Use 3% Hydrogen Peroxide
If you want to use a chemical-free trick or don’t like working with chlorine bleach, then standard 3% hydrogen peroxide is the best alternative. This one is approved by the FDA as a food-safe antimicrobial agent and can break into water or oxygen molecules.
When to Use It: Hydrogen peroxide works best to eliminate bacteria; however, it is best for plastic, acrylic, or glass cutting boards. Don’t use it on a wooden cutting board, as it will discolor the natural wood grain.
How to Apply It: Don’t dilute; just add 3% hydrogen peroxide in a spray bottle. First wash the cutting board with soapy water, then spray the undiluted hydrogen peroxide on the entire surface. Let it stay there for 10 minutes to make sure it destroys the bacteria fully. Finally, rinse it with cold water and dry.
How to Disinfect Cutting Boards? (Different material)
Following are the steps you can use to clean wooden, plastic, and glass cutting boards.
How to Disinfect a Wooden Cutting Board
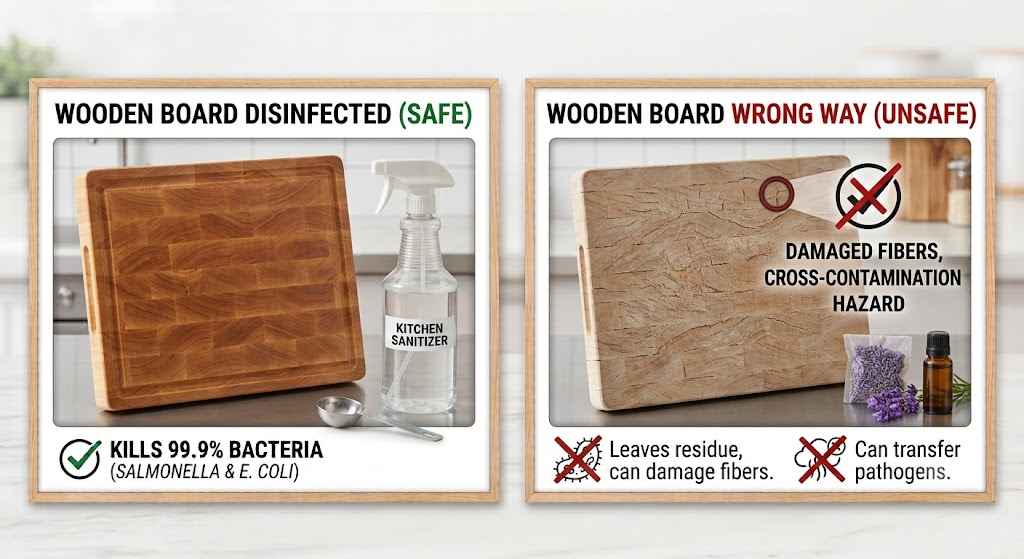
Wooden cutting boards are prized for durability and how gently they work with knives. However, wood is extremely vulnerable to bacteria. If it is not cleaned perfectly, those wood pores will absorb moisture and trap dangerous bacteria, which will go into food. Disinfecting wood needs a careful balance, meaning you have to kill bacteria without compromising the structure of wood.
The Initial Hot, Soapy Water Wash
Before disinfecting, you need to clean the wooden board completely. Wash it to remove food debris, oils, and surface film. Take your board to the sink and scrub it with the help of a brush or sponge using water and dish soap. Never soak the wooden cutting board in a sink full of water because it will lead to cracking, splitting, and warping when it dries.
Applying the Sanitizing Solution (Without Warping the Wood)
Once the board is clean from oil and food particles, remove the excess water from the surface. Now you can apply the USDA-approved sanitizing solution, which includes 1 tablespoon of unscented bleach per 1 gallon of water, or your 3% hydrogen peroxide spray. You can use clean spray or even a clean cloth dipped in this solution to clear the surface. Wet it completely and make sure there is no liquid sitting on it. This process will make sure the board is sanitized fully.
Crucial Contact Time for Maximum Pathogen Elimination
This is where many people make the mistake; they just wipe the disinfectant off quickly after applying it. Chemical sanitizers don’t clear up the bacteria from the surface in seconds; they need time to first breach and then destroy the cell walls of pathogens such as Salmonella. Let the bleach solution sit on the surface for at least 3 minutes. If you are using hydrogen peroxide, let it sit on the surface for 5 to 10 minutes.
After putting the solution on board, watch closely for evaporation and add more if it starts to evaporate. This will keep the chemical active.”
Rinsing and the Importance of Upright Air Drying
Once the recommended time is done, rinse the board properly with cold water to wash away the whole sanitizing agent. Take it out and clean it with the help of a paper towel to remove excess moisture. Dry it properly from the edges; never keep a wet wooden board back on the counter.
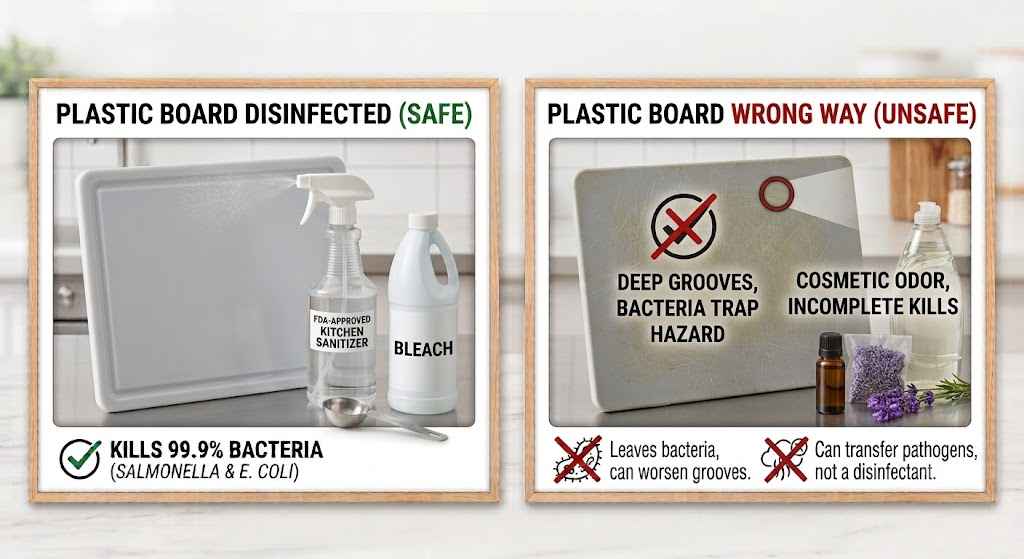
How to Disinfect a Plastic Cutting Board
Plastic cutting boards are found in every kitchen because they are less expensive, non-porous, and perform well. However, while we know plastic doesn’t absorb any water as compared to wood, it still comes with other challenges. A plastic cutting board is softer than a chef’s knife, meaning it can quickly create microscopic grooves when used daily. The standard sponge washing isn’t enough to clear it completely, and disinfection methods are critical for plastic surfaces.
Utilizing the Dishwasher’s Sanitizing Cycle
The main advantage of a high-quality plastic cutting board is its ability to work in all types of temperatures. Heat is the best way to remove pathogens, making the dishwasher an amazing sanitization tool. You can scrape off the debris and rinse the cutting board.
Place it properly on the bottom rack of the dishwasher. Don’t think a single wash cycle is fine; keep the dishwasher’s “Sanitize” cycle or high-heat dry setting active so the bacteria can be killed easily.
Note: Very thin, cheap plastic mats may warp under high heat. For flexible plastic mats, stick to the manual methods below.
The Deep-Groove Manual Soak Method
If your cutting board doesn’t fit in the dishwasher, then you can simply go for the handwash option. A plastic cutting board is easy to wash. It is not like a wooden one where sanitizing liquid can damage or soak into a structure and bacteria can take hold.
First scrub the board with soapy water to remove dirt from the surface, then fill the kitchen sink and add a USDA-approved sanitizing solution, such as 1 tablespoon of unscented liquid bleach per 1 gallon of water, in it. Soak the plastic cutting board in the solution for 5 minutes, making sure it is completely submerged. This time it will kill the bacteria that lurk in the plastic scores. Lastly, remove the board and clean it with water and let it dry.
Removing Stubborn Stains While Disinfecting
The only issue people face with plastic boards is they quickly absorb all the pigments from foods like tomatoes, turmeric, and carrots. Bleach can remove the stain and kill bacteria but also leads to the cutting board being discolored at the same time. Don’t rely on the weak lemon-and-salt method; use this formula instead, which includes mixing 3 parts baking soda, 1 part standard dish soap, and 1 to 2 parts 3% hydrogen peroxide until a thick paste occurs.
Spread the paste on all areas of the board with the help of a scrubbing brush or sponge. This formula is an FDA-approved chemical disinfectant to kill bacteria.
Let the paste stay on board for 10 hours or overnight. The next morning you will see the board is free from bacteria and strain with no color change.
How to Disinfect a Glass Cutting Board
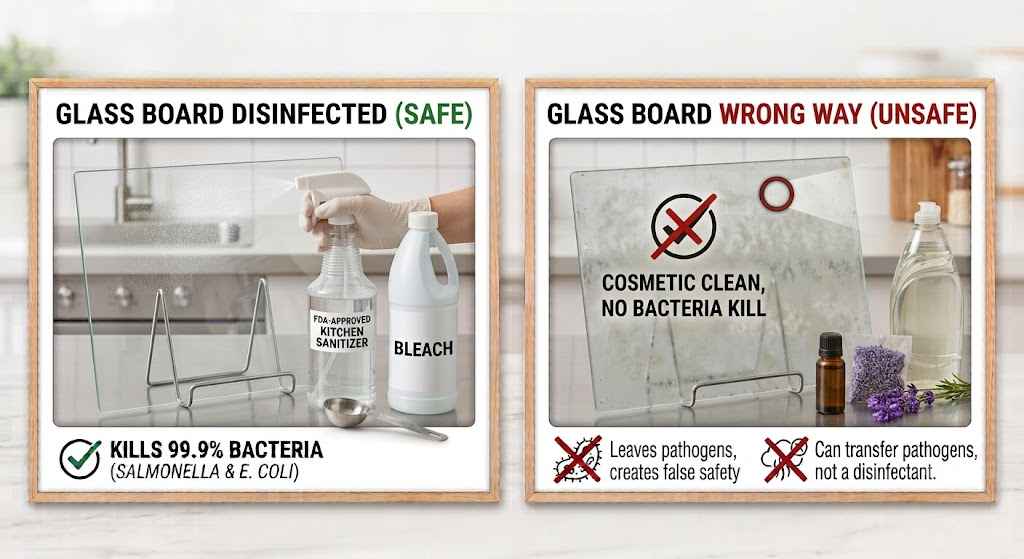
Glass and tempered ceramic cutting boards are famous options and the best alternatives for home cooks who want a sleek and non-porous surface. While the wood and plastic cutting boards can develop jagged knife grooves where microscopic bacteria take place, glass is hard and fully scratch-resistant. A glass board also comes with a different set of food safety challenges.
Since it can’t absorb moisture, the juices of raw meat can pool on the surface, which creates a spill hazard that contaminates the kitchen’s other equipment if not handled properly.
Utilizing the Dishwasher’s Sanitizing Cycle
Like high-quality plastic board glass, it also doesn’t have any water effect and can withstand extreme thermal temperatures. You can use the dishwasher to clean it; first remove the juices from it and rinse it with hot water. Put the glass board on the bottom of the rack; make sure it is away from other dishes. Run the heavy-duty cycle and select an option like the “Sanitize” cycle or high-heat dry. This will completely clean and remove any bacteria that take place.
The Multi-Surface Manual Spray Method
If your glass cutting board can’t fit in, then you can go for the handwashing process. Use a manual spray to disinfect it without damaging the components.
First scrub the whole board with the help of water and grease-cutting dish soap, then rinse. Fill the spray bottle with a USDA-approved sanitizing solution that includes 1 tablespoon of unscented liquid bleach per 1 gallon of water or undiluted 3% hydrogen peroxide.
Spray the entire glass board until the liquid forms a wet layer on both the surface and edges. Let the solution stay on it for 5 minutes so it kills bacteria easily. Lastly, rinse it with cold water and let it dry completely.
Removing Cloudy Film and Odors While Disinfecting
The glass cutting board doesn’t absorb deep pigments like a plastic one does; however, it can trap some surface odors, leading to a microscopic texture where bacteria can take place. Don’t rely on basic rinse; use a formula that includes mixing equal parts white vinegar and 3% hydrogen peroxide in a spray bottle or make a liquid of baking soda and hydrogen peroxide.
Coat the glass surface completely if you are using baking soda paste; scrub it gently with a normal and non-scratch sponge. The solution or paste is powerful for removing bacteria. Let the mixture stay on board for 10 minutes, then rinse it well with the help of water and dry the surface with a microfiber cloth.
Cross-Contamination Prevention: Best Practices for the Kitchen
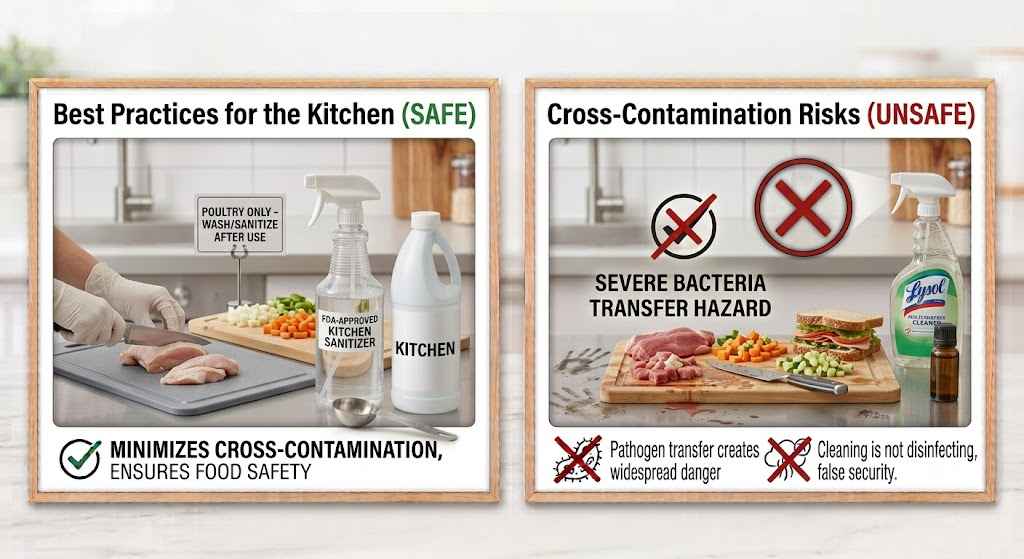
Disinfecting your cutting boards is only half the battle. If your kitchen workflow allows pathogens to jump from a dirty surface to a clean one before you even open your sanitizer, your family remains at risk. True food safety requires a proactive strategy to eliminate cross-contamination entirely.
The Two-Board System: Separating Raw Meats from Produce
The most effective way to protect your kitchen from cross-contamination is to implement a strict, non-negotiable two-board system. You should never prep ready-to-eat foods on the same surface used for raw proteins.
- Board 1 (The Protein Board): Reserve a dedicated plastic or composite board strictly for raw poultry, meat, and seafood. Plastic is ideal here because it can handle heavy-duty chemical disinfection and high-heat dishwasher cycles. Many home cooks use color-coded boards (such as red for raw meat) to ensure no one in the household mixes them up.
- Board 2 (The Ready-to-Eat Board): Reserve a separate wood, bamboo, or plastic board exclusively for fresh produce, bread, cheese, and other items that will not be cooked before serving.
By keeping these surfaces isolated, you ensure that high-risk bacteria like Salmonella from raw chicken never make contact with an ingredient like lettuce, which won’t pass through a heat source capable of killing bacteria.
How Often Should You Sanitize Your Boards?
According to standard safety rules, the cutting board should be washed with soap and water after getting used every single time; however, the true disinfection can take place with all the processes we discuss.
When you cut raw meat, poultry, or any seafood item, you need to disinfect it immediately. Don’t leave the board dirty for long time bacteria will take place.
If you use the cutting board only to slice an apple or bread, then you can just wash it with soapy water. You can also disinfect these boards once a week.
Long-Term Maintenance: Keeping Your Boards Safe Over Time
Even if you disinfect the cutting board completely, it still fails if the underlying material is neglected. As time passes, the knives degrade the surface and water strips away its protection. That’s why Long-term maintenance is important to keep the cutting board safe.
If we talk about a wood cutting board, it absorbs all the liquid that hits the surface, leading to microscopic cracks that come from meat juices and water like a sponge. To avoid this issue, you need to examine the wood condition regularly. Use a deep cleaning method once a month. Give a wooden board a spa treatment by using food-grade mineral oil or beeswax:
- Make sure the board is completely dry and let it sit for 24 hours before oiling.
- Don’t use vegetable, olive, or canola oils. Use grade mineral oil on the board.
- Use a clean and soft cloth to rub the oil on the wooden cutting board surface from side to front and back. Leave it overnight, then remove the remaining oil the next morning with the help of a clean paper towel.
Also Read: How to Clean a Microwave: The Easy, No-Scrub Steam Method
When to Throw It Away: Recognizing Dangerous Knife Grooves and Scratches
No cutting board can last forever; every time you cut something on it, there will be many scratches. By using it for months and years, these scratches turn into deep cuts.
Once a cutting board develops many scratches, it changes into a biohazard. Use the chart below to understand when to keep the board and when to discard it.
| Surface Condition | Safety Level | Required Action |
|---|---|---|
| Shallow, superficial lines | Safe: Normal wear and tear. Material is smooth enough for sanitizers to contact all surfaces. |
Keep & Disinfect: Continue your routine hot soapy wash and bleach/peroxide disinfection. |
| Deep, jagged crevices (Fingernail drops into the groove) |
Dangerous: Deep valleys shield bacteria from both your sponge bristles and chemical sprays. |
Throw It Away: The board can no longer be guaranteed 100% microbiologically safe. |
| Splits, cracks, or loose seams | Dangerous: Raw meat juices seep into the center of the board via capillary action, rendering disinfection impossible. |
Throw It Away: Discard immediately to prevent hidden, deep-seated bacterial growth. |
The Fingernail Safety Test: You can also do a finger test by just using your fingernail firmly on the center section. If the nail catches or gets into a scratch, it means the board is completely done; discard it.
Refrences for Further Reading
Here is a list of official government resources and food safety guidelines to help you verify the standard protocols for sanitizing cutting boards:
- Read the full fact sheet on the USDA Food Safety Basics Page.
- Check out their step-by-step cross-contamination prevention guide on the CDC Food Safety Portal.
- Review the consumer checklist directly on the FoodSafety.gov 4-Steps Page.
