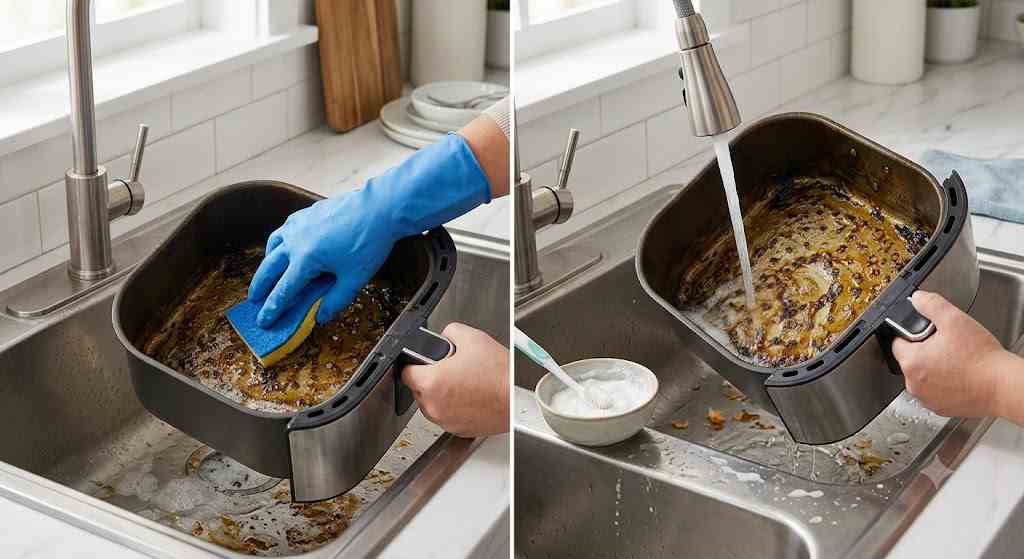
Nowadays everyone uses air fryers because they don’t require a high amount of oil to cook crisp, fast, and delicious meals. However, the air fryer is based on powerful convection fans to circulate hot air, often reaching the temperatures of 350°C to 400°C, so the food particles don’t sit on the bottom of the basket.
When grease takes place repeatedly, it undergoes a process called polymerisation, which converts liquid fat into a tough and sticky crust which can’t be easily cleaned by water and soap. If you let this crust build, it leads to smoking during cooking, rancid off-flavours in the food, degraded heating efficiency, damage to non-stick coatings and fire hazards.
This guide will teach you how to clean air fryer naturally, step by step, from post-meal maintenance to deep chemical restoration and how to prevent it long-term.
Universal Safety Guidelines & Basic Preparation
Before you use anything like water, detergents, or cleaning tools, make sure you observe three important safety rules to protect the appliance as follows:
Complete Power Disconnection: Make sure to unplug the air fryer before cleaning because turning off the machine while plugged in can still leave the control board and power supply energised.
Thermal Shock Prevention: Never place the hot air fryer basket or crisper plate in the cold water after cooking because a sudden change in temperature can cause metal expansion and contraction differently, leading to chipped coatings, warped baskets and cracked nonstick linings. Cool the equipment first for 30 to 45 minutes and then clean it. The critical but elements like the electronics, digital motherboards, heating coils and fan motors are contained in the main unit. Don’t get water in these places.
Inventory of Supplies: Safe Equipment vs. Coating Killers
When you are eating. Using the wrong cleaning supplies on an air fryer can destroy non-stick coatings such as PTFE/Teflon or ceramic layers quickly. How to Clean an Air Fryer 1.
The Safe Cleaning Arsenal
- Liquid Dish Soap: The first one on the list is liquid dish soap, as it has a grease-cutting formula, so it will break down the fresh lipids easily.
- Non-Abrasive Microfibre Cloths & Soft Sponges: These absorb oil quickly without microscopic abrasion.
- Baking Soda (Sodium Bicarbonate): They act as mild alkaline abrasives and natural chemical cleaners which remove grease without the need for scratching.
- Distilled White Vinegar: This acidic agent cuts the mineral deposits and soap scum and reduces fishy or sulphurous odours.
- Soft-Bristled Nylon Brushes: These soft bottle or toothbrushes clean the grates, mesh bottoms and tight corners perfectly.
- Wooden Skewers & Toothpicks: They are best for gently removing food crumbs that are stuck in small holes.
Hazardous Materials to Avoid
- Steel Wool & Metal Scouring Pads: They strip the non-stick layers, which leads to aluminium or steel exposure.
- Abrasive Scouring Powders: These harsh cleaners strip away the protective coatings with time.
- Aerosol Cooking Sprays: The Pam spray contains chemical propellants like lecithin, propane, and butane, which can easily burn the non-stick surface and leave an insoluble film which destroys non-stick properties.
- Concentrated bleach or ammonia: It corrodes the elements that have internal metal heating, and when heated in the future, it causes dangerous fumes.
Daily Maintenance: The 5-Minute Post-Cook Routine
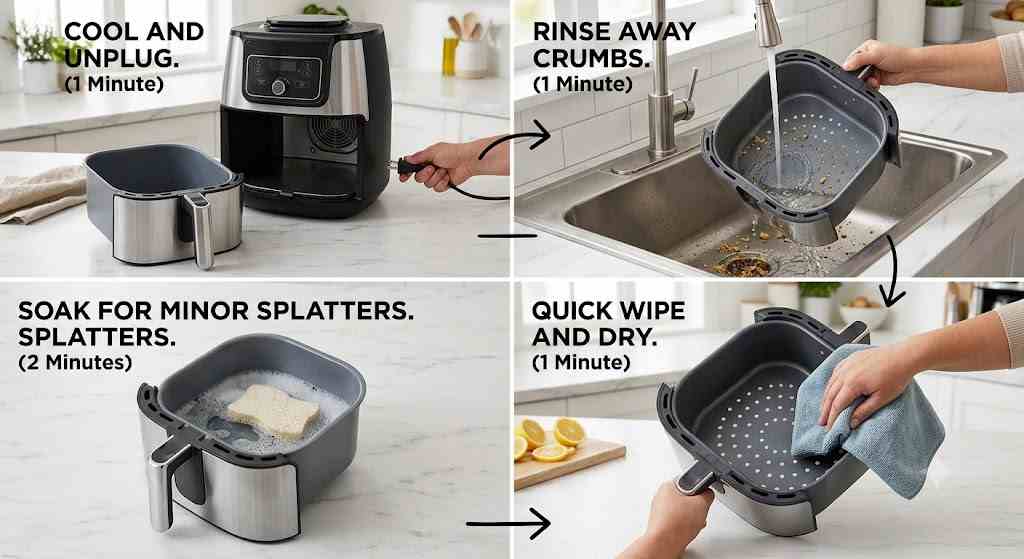
It is important to clean your air fryer basket after every meal you prepare in it because it will prevent the soft oil residue from staying, oxidising and turning into hard carbon deposits.
Step 1: Drain Liquid Fat
Once it is unplugged and the elements are cold enough, slide out the drawer and remove liquid grease or oil from the basket into a tin can. Never pour those oils or liquids into your drain, as it will lead to blockage.
Step 2: The Hot Soaking Phase
Add the removable drawer, basket, and crisper plate into the sink. Pour 2 to 3 pumps of grease-cutting liquid dish soap and fill the basket with hot water. Let the liquid stay in it for 15 minutes; this will soften the starch and fats.
Step 3: Gentle Washing & Crevice Cleaning
Use a soft sponge or microfibre cloth and wipe all the interior and exterior surfaces of the basket and crisper plate. For deep cleaning you can use a soft-bristled nylon brush dipped in soapy water. Scrub both sides gently and use a toothpick to remove the trapped hidden food bits from tiny air vents.
Step 4: Rinse and Dry Well
After you wash all the equipment, rinse it in warm running water so that the soap film is removed. Wipe all the parts with the help of a clean dish towel or microfibre cloth. Once they are completely dry, reassemble them. Avoid storing them wet because it will lead to rust, water spots, and mildew growth.
Deep Cleaning: Removing Polymerised, Baked-On Grease
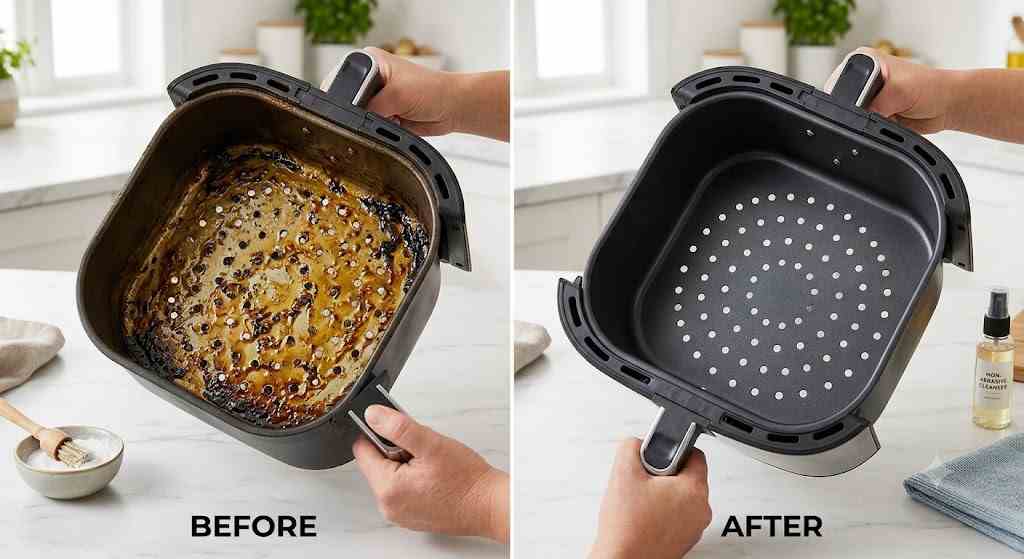
If you ever notice there is a dark sticky spot or brown crust that develops and can’t be removed from daily dish soap, it means the grease is polymerised. You need to clean the air fryer with the help of pantry staples. Avoid using harsh commercial chemicals, as they aren’t safe for air fryers.
Method A: The Baking Soda & Vinegar Paste (Recommended)
The first method is based on two items which can easily be found in everyone’s kitchen: the baking soda can saponify fat molecules without the need for scratching.
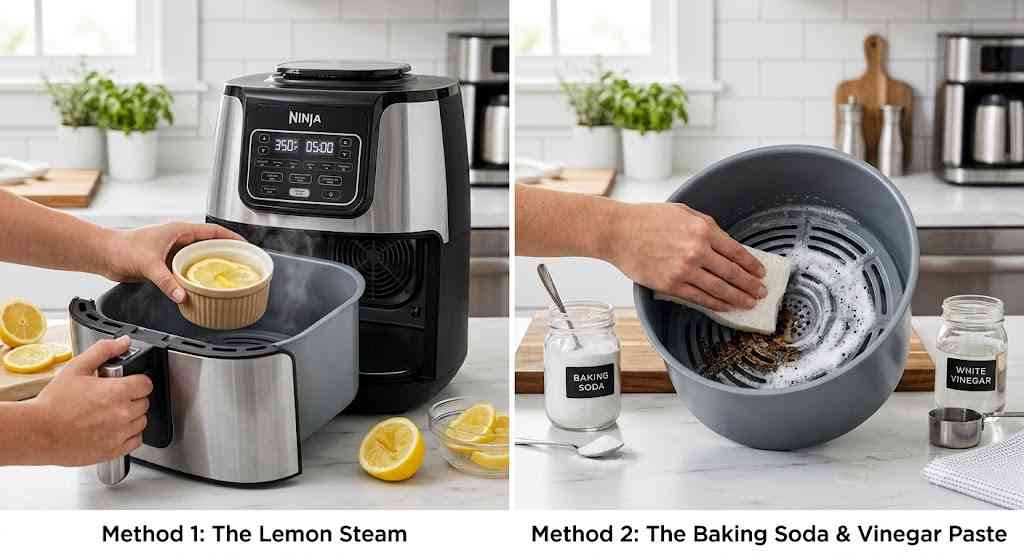
For this you need to mix 3 tbsp of baking soda with 1 tbsp of white vinegar to make a thick paste. Apply this to black spots, dark corners or where you find grease.
Let the paste stay there for 20 to 30 minutes, as it will soften the carbonised fats. Use a soft nylon brush or sponge to soften the buildup more.
Once done, rinse all the paste with the help of warm water and dry it completely.
Method B: The Enzyme Detergent Soak
This method is especially for the heavy grease developed on the whole surface.
First place the basket and plate in the basin, then add 1 tablespoon of concentrated powdered dishwasher and fill the basket with boiling water. Make sure the coated surfaces are submerged completely.
Let it soak for an hour, as dishwasher detergents will break the fat chain. Clean it with the help of a soft sponge, then rinse and dry completely.
Cleaning the Heating Element & Interior Cavity
We learn how to clean the air fryer basket and plate. Now it’s time to learn how To clean the heating coil and convection fan. Perform this maintenance every 1 to 2 months depending on frequency of use.
| Target Zone | Recommended Frequency | Best Cleaning Tools | Action Plan |
|---|---|---|---|
| Outer Casing | Weekly | Damp Microfiber Cloth | Wipe fingerprints and dust; avoid buttons |
| Interior Cavity Walls | Monthly | Sponge & Mild Soap Solution | Wipe splatters without soaking wiring |
| Heating Coil Assembly | Every 1–2 Months | Inverted Unit + Soft Nylon Brush | Softly scrub baked carbon; wipe with damp cloth |
| Exhaust Vents | Quarterly | Vacuum Brush / Microfiber | Remove dust lint blocking airflow |
Invert the Main Unit: First make sure the air fryer is unplugged and cold, then flip the main body upside down. Make sure you first add a clean towel on the countertop. This flips the heating elements downward, and you can see everything visibly.
Examine the heating element or fan; look carefully if there are any brown or black oil droplets.
Apply a Mild Cleanser: Dip sponge or brush into hot water and dish soap solution, then remove water from sponge completely, as it needs to be damp, not dripping.
Scrub Lightly: Carefully scrub the area, like metal coils and housing walls behind the heating element; don’t do it aggressively.
Wipe Away Soap Residue: Use a clean microfiber cloth damped in clean water to wipe the soap and remove grease.
Air dry: Leave it for 1 to 2 hours so the internal moisture evaporates completely before connecting power.
Brand-Specific Cleaning Nuances
Different brands use different designs, coatings, and structural components, so you have to choose cleaning techniques according to the specific appliance types that require you to preserve their structure.
Ninja Air Fryers (Basket & Grill Models)
They heavily use ceramic nonstick linings, which is good but susceptible to thermal shock. Always let this type of air fryer reach room temperature before washing.
Some models of Ninja air fryers also include removable mesh splatter shields over the heating element. Make sure you remove and clean it in hot soapy water every time you use the air fryer to prevent fan blockages.
Cosori & Instant Pot Drawer Models
These models have a plastic guard on the release button, which links the inner basket to the outer drawer. Clean it monthly with a soapy toothbrush.
It had a wire mesh surface too, which can easily trap the meat fiber, so always scrub the underside of the mesh.
Oven-Style / Toaster Air Fryers (Breville, Cuisinart, Emeril)
These types of air fryers have glass doors, so clean them with baking soda paste, as you won’t need to do any scratching. They also have crumb trays, which you can pull out every time once you use the air fryer. Line it with aluminum foil for cleaning.
To clean wire racks, use hot water and dishwasher detergent. Soak them in it and scrub them with nylon scouring pads.
How to Eliminate Stubborn Odors from Air fryer
Some people also complain the air fryer smells like fish, garlic, burnt grease, or synthetic plastic because standard cleaning doesn’t deodorize it. Understanding how to clean an air fryer naturally with steam and citrus is the safest way to remove odors without the use of chemicals.
The Lemon Steam Method (Fast & Effective)
First take a small heat-safe bowl, then add 1 to 2 cups of water and 2 tbsp of fresh lemon juice. Place it into the air fryer basket and run the machine for 3 to 5 minutes at a high temperature. The citrus steam will penetrate inside and reach each internal corner, leading to grease loosening and neutralizing pungent compounds. Carefully remove the hot bowl and let the basket cool; wipe the interior with a clean cloth.
The White Vinegar Neutralizing Wipe
To remove fishy odor, you need to mix white vinegar and distilled water in a bowl; make sure they are equal. Dip a clean cloth in this solution and wipe the basket, crisper plate, and interior walls completely. Leave the basket outside for the whole night so the vinegar smell goes away.
Preventative Care: Keeping Your Air Fryer Cleaner Longer
If you clean the grease when it starts building, you can save hours of scrubbing and can increase the machine’s operational lifespan.
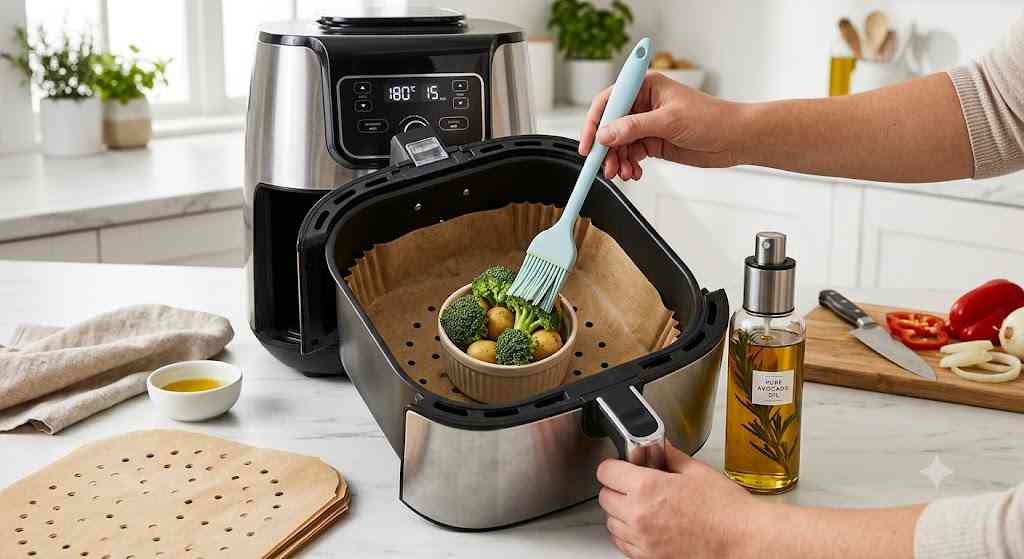
- Instead of putting food directly inside, use perforated parchment paper sheets or food-grade silicone liners to prevent grease. These papers will save food and oils from dripping.
- Instead of using commercial cooking sprays, go for manual pump misters filled with high-smoke-point oils like avocado oil, light olive oil, or canola oil, as they don’t have chemical propellants.
- Lightly Pre-Coat Sticky Foods: When you are cooking lean protein or battered items, apply oil with the help of a brush on food instead of the basket surface.
- Always clean fingerprints, oil smudges, and dust from the display and outer wall.
Official Government & Regulatory Resources
To read more about safe appliance care, kitchen sanitation standards, and home fire safety, consult these official government guidelines:
- U.S. Department of Agriculture (USDA) – Kitchen Companion: Your Guide to Food Safety Official federal guide on proper cleaning, cross-contamination prevention, and maintaining hygienic food preparation surfaces.
- Resource: USDA Food Safety and Inspection Service
- U.S. Consumer Product Safety Commission (CPSC) – Home Appliance Safety Official safety alerts, recall databases, and guidelines on preventing thermal shocks and fire hazards in countertop heating appliances.
- Resource: CPSC Official Website
- U.S. Fire Administration (USFA) – Cooking Fire Safety Guidelines Federal safety protocols regarding grease fires, appliance electrical hazards, and proper kitchen maintenance.
- Resource: USFA Appliance Safety Guide
- National Institute of Standards and Technology (NIST) – Household Appliance Energy & Care Federal research and recommendations on maintaining optimal efficiency and safety standards for electric kitchen appliances.
- Resource: NIST Standards and Guidelines
