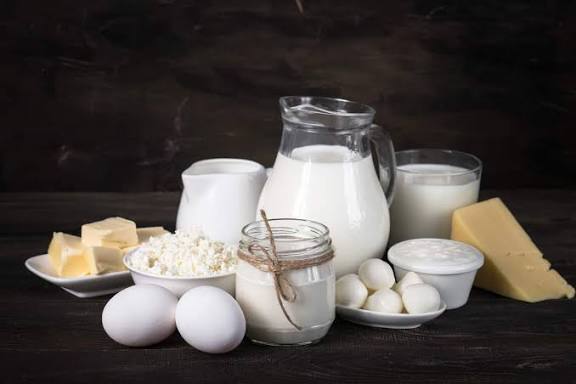
Raw milk from backyard farms and small dairies carries real bacterial risks, and most home producers in 2026 want a simple, effective answer before bottling a drop. The best ways to pasteurize milk at home depend on the equipment you have, the volume you process, and how much precision you’re willing to manage.
Pasteurization doesn’t require a commercial dairy setup. Whether you keep a single dairy cow or run a small goat herd, the five methods below cover every realistic option, from a stovetop pot to a dedicated electric unit.
Electric Countertop Pasteurizer
Electric countertop pasteurizers take the whole process off your hands: fill the reservoir, dial in the temperature and time, and the unit manages heating, holding, and, in some models, cooling as well. That makes them practical for anyone running 1 to 3 gallons at a time on a consistent schedule. Most home-use units, like the milk pasteurizer machine from Milky Day, run on standard 120V outlets and don’t take up much counter space.
Precision is what separates these machines from doing it by hand. A digital controller holds the target temperature within a fraction of a degree across the entire hold period, so there’s no temperature drift and no human error creeping in. For producers who pasteurize daily or several times a week, the cumulative time savings are significant.
And consistency matters if you make cheese or cultured products at scale. Inconsistent pasteurization temperatures produce inconsistent results in the finished product. An electric unit solves that problem entirely. After the hold cycle, pour the milk into a pre-chilled container and place it in an ice bath or directly into the refrigerator.
Stovetop Batch Pasteurization
Stovetop batch pasteurization is the most accessible approach, and it doesn’t require anything beyond what’s already in most kitchens. You slowly heat a pot of raw milk over medium heat, stir constantly, and hold it at 145°F (63°C) for exactly 30 minutes. A clip-on dairy thermometer isn’t optional here; guessing by touch or visual cues produces under-pasteurized milk or a scorched bottom.
The main downside to stovetop pasteurization is attention. You can’t walk away. Milk heats unevenly if you stop stirring, and a few degrees above 145°F for too long changes the flavor noticeably. That said, many home producers prefer this method because there are no moving parts, no electricity required, and the cleanup is straightforward.
After the 30-minute hold, you cool the milk as fast as possible, ideally by setting the pot in an ice bath and stirring until it drops to 40°F or below. Fast cooling stops bacterial regrowth before it can restart.
High-Temperature Short-Time (HTST) Method
HTST pasteurization brings milk up to 161°F (72°C) and holds it there for just 15 seconds. At a commercial scale, this runs through a plate heat exchanger, but home producers can replicate it on a stovetop or with a small electric unit. That shorter exposure at higher heat damages less of the milk’s natural flavor than the longer batch method does, which is why small-batch cheesemakers tend to reach for it.
The catch is precision. Getting milk to exactly 161°F and holding it for 15 seconds, not 10 and not 30, takes a fast-response thermometer and a steady hand. Digital instant-read thermometers rated for dairy work are accurate to within 0.5°F, and that accuracy matters at this temperature range.
So if you plan to make cultured dairy products like yogurt or soft cheese, HTST is worth the extra attention. The milk retains slightly more of the whey proteins that cultures need to set properly, and the finished texture in yogurt tends to be thicker than milk pasteurized at 145°F for 30 minutes.
Sous Vide Pasteurization
Sous vide pasteurization uses an immersion circulator to hold water at a precise temperature for a set time, with sealed bags or mason jars of raw milk submerged in the bath. The FDA’s extended holding times for lower temperatures apply here: milk held at 135°F (57°C) for 2 hours achieves pathogen reduction comparable to 145°F for 30 minutes, according to data published by the National Center for Home Food Preservation.
This method suits small volumes well. A 1-quart mason jar fits easily in most sous vide setups, and the circulator maintains temperature without any manual stirring. The tradeoff is time, two full hours per batch, plus the circulator itself costs between $80 to $150 for a good unit.
The flavor payoff is real. Lower-temperature pasteurization doesn’t denature proteins as aggressively, so sous vide milk tastes remarkably close to fresh raw milk. Patience matters here. If flavor is your top concern and you can spare the time, this method delivers the most natural-tasting result of any home option available. Once the hold period ends, cool the jars in an ice bath right away and then refrigerate.
Double Boiler Method
The double boiler method cuts down the risk of scorching, which trips up more beginners on the stovetop than anything else. A smaller pot of raw milk sits inside a larger pot of simmering water; the water acts as a buffer so direct heat never touches the milk pot itself. Temperature climbs more slowly and evenly than with direct-heat methods, giving you a bit more time to catch it before it overshoots.
This setup is especially useful when you’re pasteurizing cream or high-fat milk, because fat-rich milk scorches quickly and picks up off-flavors at the bottom of a direct-heat pot. With a double boiler, that risk drops considerably. You still need to stir and watch the thermometer throughout, targeting 145°F for 30 minutes or 161°F for 15 seconds, depending on the protocol you’re following.
The practical limitation is volume. Double boiler setups work well for 1 to 2 quarts but become awkward with a gallon or more, since larger volumes need a very large outer pot and take a long time to reach temperature. For small daily batches, though, the method works and requires nothing beyond a standard kitchen setup.
Conclusion
Every one of these methods works; the right choice comes down to your volume, your schedule, and how much equipment you want to deal with. Stovetop and double boiler setups cover most home producers without much financial commitment, while HTST and sous vide offer better flavor retention for cultured dairy products. Electric countertop units make the most sense once you’re pasteurizing on a regular basis and want the process to run without much intervention. Whichever route you go, buy a good dairy thermometer, chill your milk fast after the hold period, and keep it stored below 40°F.
